


A page from the "Causes of Color" exhibit...
Lesson 1 (All causes): Student instructions

You can learn all about color and why the grass is green and the sky is blue. For the next few weeks, your class will study colors. Follow along and you will be able to explain the difference between colored lights and colored paints. You will be able to make your own light bulb, and mix chemicals to produce light. You can test some materials from home, like soap and juice, and see color changes. Bubbles, CDs, milk, and Lifesaver mints all produce different colors. You’ll check back to this page from time to time as you learn about color, and build your nodemap.
Background
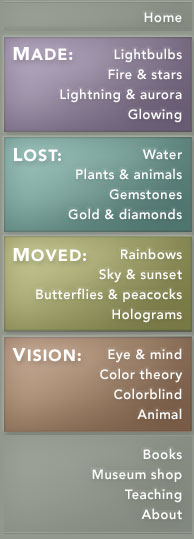
Light originates from the sun and is a form of energy. Light produces colors. Light can be made; light can be lost; and light can be moved. See examples of light made, light lost, and light moved. This WebExhibit explores all possibilities of color and its causes.
A “nodemap” is a new way to present information. You can design a nodemap using “SpicyNodes,” a tool for idea mapping that is fun and easy to use. You will have your very own URL to access your node map. To get a sense of how it works, you can see an example of a node map. When you make your own, you can customize the colors and pictures.
What To Do
Part A
- One of the first examples of “light made” is incandescence. For directions to make your own light bulb, read the “What To Do” section carefully.
- You need to work with a partner to build the light bulb. Your teacher will have the materials. Wear your safety goggles. Record your results in a data table in your science notebook. Do as many of the variations as you have time.
- In order to see an example of “light lost,” read the directions for scattering of light. This is an activity you need to do for homework. Follow the directions carefully and share your results with someone at home.
- To see an example of “light moved,” another activity you can do with a partner is separating a mixture of colors. Caution: Isopropyl alcohol is flammable. Wear your safety goggles.
- Staple your chromatogram (filter paper) with a label into your notebook.
- You have now completed one activity in each of the three categories of light made, light lost, and light moved.
- If you have a digital camera, you can take pictures of your experiments and upload them to your nodemap to make it more interesting.
How It Works and Variations
See why making a light bulb works.
See how scattering light works.
See how separating a mixture of colors works.
Part B
- Start at the page at SpicyNodes that your teacher tells you, and start making a new nodemap.
- “Causes of Color” is the main topic. Put those words in the first bubble or oval or cloud in your nodemap.
- The four sub-topics are: Light Made, Light Lost, Light Moved, and Vision. Put each topic in its own node, and put these four topics below your main node. You now have five nodes as part of your map.
- Each of your sub-topics needs three more nodes. These new nodes should be examples of each sub-topic, with a brief explanation of each example. Work on each node, one at a time, until you have three examples of light made; then three examples of light lost; three examples of light moved, and three examples of vision from the Causes of Color WebExhibit. Try to imagine you are teaching someone younger than yourself the causes of color. Be creative and use examples that are a part of everyday life.
- Copy your URL into your notebook when you are finished; and copy, paste, and send it in an email to your teacher, your parents, and your friends.
Can You Answer These Questions?
- What is the difference between “light made” and “light lost”?
- What is the difference between “light made” and “light moved”?
- Why does your light bulb in a jar stop giving off light?
- What colors did you see through the glass of milk?
- What colors are part of chlorophyll?
Other Activities
- You can add more than three examples of each sub-topic to your node map.
- In your node examples you can have a sub-set of explanations; for example, under “light bulbs” you can have a set of three nodes for incandescent, fluorescent and CFL.
- Under the “vision” sub-topic, you have colorblindness as an example. You could create a sub-node that contains the URL for the colorblindness test. Can you find it on the web site? (If not, your teacher can help you navigate.)
- Perhaps your teacher will choose the best nodemaps in the class. Is yours one of the best?
- You can try other DIY activities on the web site, such as using CDs, mixing lights and mixing paints, and making bubbles.
- Draw a model of the electromagnetic spectrum using colors for the different categories. Label high and low frequency and long and short wavelength.
- Use a compass and make a color wheel, labeling primary and secondary colors.
- Are you colorblind? Is anyone in your family colorblind? Did you take the tests?
- Do you have a collection of rocks and minerals? What bright colors do you have?
- Go to this page for directions to make a crossword puzzle with some of the vocabulary words in the WebExhibit, Causes of Color.
- Is there a difference in the colors at sunrise and sunset? Try to photograph both a sunrise and sunset from your house.