

A page from the "Causes of Color" exhibit...
Experiment with making bubbles

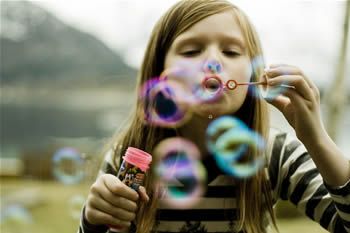
Blowing bubbles creates a thin film of water inside a membrane of detergent. The water is so thin, that light interference creates colors. With this recipe, you can make small or large bubbles yourself. (Photo by Helene Valmo Aasmyr)
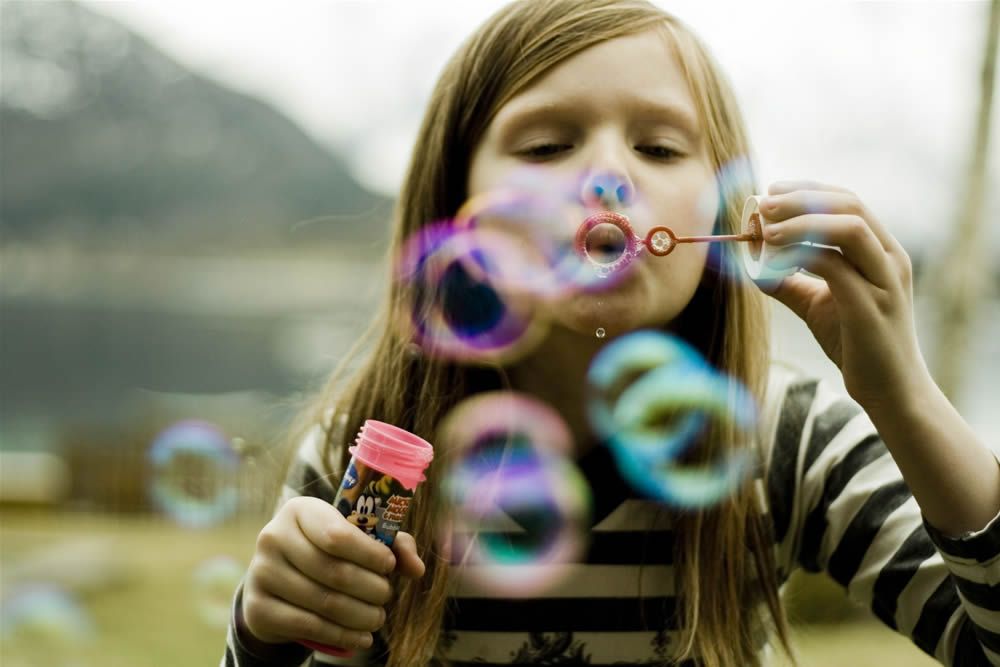
Whether you are 1 or 100, bubbles never fail to bring a smile to the faces of even the staunchest curmudgeons. In this activity, we will explore the science behind these amazing colorful spheres.
Bubbles
What makes bubbles have such a vividly colorful surface? Here, we will take easy to find materials to create a super bubble solution. Then we will explore to determine how bubbles react with light.
Ingredients
- ½ cup dish liquid
- 5 cups water
- 1 teaspoon glycerin, sugar or corn syrup (optional)
How to Do It
- Mix all ingredients together in a lidded container large enough to hold them.
- Let the mixture sit for several hours uncovered… bubble solutions seem to improve with aging.
- To blow bubbles, use a wand, or found materials like produce baskets, bent wire hangers, or straws to make your own wand.
- Note the colors you see as you blow each bubble. Try blowing in different light conditions to see if you can get a different effect.
NOTE: Glycerin can be purchased in most drugstores, art supply stores, and kitchen supply outlets.

How It Works
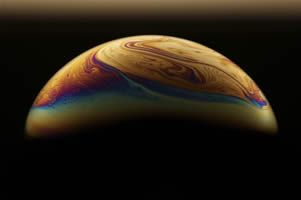
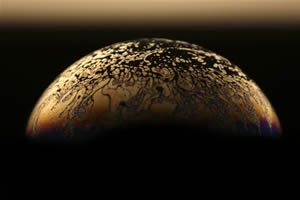
The color we see swirling about the surface of bubbles serves as more than a beautiful sight. It exists due to the varying thicknesses of the soap film. As light waves travel through the bubbles, the waves and their subsequent wavelengths react differently. You’ll remember that red light has the longest wavelength and violet light has the shortest. As the waves travel through the bubble they collide with each other. If they collide crest to crest, then they reinforce each other’s impact and effects, causing constructive interference. If the waves meet crest to trough, they cancel out each other’s effect, and the result is destructive interference. Interference is responsible for the pearly luster of a shell, the colors of insect wings and the feathers of many birds, as well as the color of bubbles. White light is separated into colors as it reflects from the two surfaces of a thin film. Where the two reflections interfere constructively, they produce a band of color. Where they cancel each other, that color is subtracted from the spectrum.
|
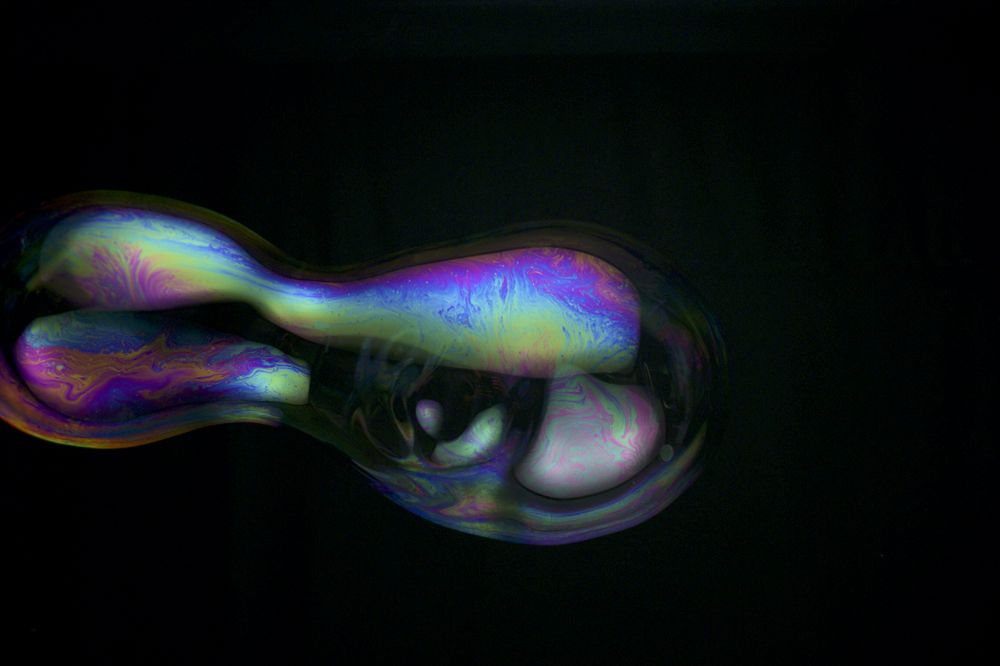
The swirls were causes by gently blowing on the bubble. (Photos by Jason Tozer) |
After a few more seconds, as the water in the bubble drifts towards the bottom, and the bubble gets thinner, the colors begin to vanish, and the bubble may look speckled moments before it breaks. |
Variations
- Want bigger, longer lasting bubbles? Try adding more glycerin, sugar or corn syrup. The recipe used here is based on a 1:10 ratio of soap to water, with a little glycerin added to improve the "strength" of the bubble. Try varying the ratios to create your own power bubble mix. Also consider using distilled water. The purity of distilled water helps bubbles to last longer, as well.
- Want to photograph your bubbles? Try using a diffused light source from the top, and shoot the bubbles against a black background. Here’s what renowned photographer Jason Tozer had to say: "I’d say the main thing is eliminating extraneous reflections so you only see the beauty of the bubble. The bubbles in my exhibit were taken using a semi opaque perspex/acrylic tunnel with the rest of the room covered in black velvet. I have also found using a long macro lens useful. This allows me to get the camera as far away as possible, reducing the amount of reflection."
- Want to try something different? How about glowing bubbles? Try substituting part of the water used to make your bubble solution with glow water. You can purchase washable glow paint or commercial glow water for this, or you can make your own glow in the dark water with a yellow, green, or orange highlighter pen. Pop the top off the back of the highlighter pen to expose the ink capsule. Remove the plastic casing from around the capsule, exposing the ink that has been soaked into a roll of felt. Soak this in a small amount of water – ½ to 1 cup of water. All done! Use this dye solution to create bubbles and then get out a black light and enjoy the show.
Estimating bubble lifetimes
You will need:- A large bubble wand, such as a loop of wire
- A good bubble mix (see some of the links below for good recipes to make your own)
- A dark background, such as wood or black cloth
- A strong source of incident white light, such as sunlight or a torch
Dip the wand into the bubble mix, and hold up the soap film with the light shining from your side, and a dark background behind. With a little experimentation you should spot a series of horizontal stripes in repeating colors, wide to begin with, then narrower as they approach the bottom of the wand. As the film gets thinner, these fringes move lower and lower. Before popping, the film will loose all its visible colors; this is an indicator that the film is too thin to last any longer.